


Contacts 79
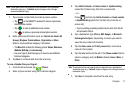
1.
Press ➔ and then tap ➔
Accounts and
sync
.
2. Locate the email account containing the contacts you wish
to synchronize.
3. Tap within the adjacent account field to reveal the
account’s synchronization settings screen.
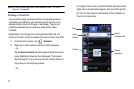
4. To synchronize Contacts, tap
Sync Contacts
. A green
checkmark indicates the feature is enabled.
Note:
The process of updating your Contacts tab can take several minutes. If
after 10-20 minutes, your list has not been updated, repeat step 2-3.
5. Your
Contacts
tab then reflects any updated Contact
information.
Note:
Syncing of contacts requires you are logged into your Gmail and
Corporate accounts via the device.
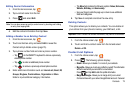
Display Options
The Display options menu allows you to allows you to choose
whether to display contacts saved from the Phone, SIM, external
source, or all. You can also choose to display only contacts that
have phone numbers.
1. From the Home screen, tap .
2. Press and then tap
More
➔
Display options
. Configure
any of the following options:
• Only contacts with phones -
Allows you to display only those
contacts containing phone numbers.
• Sort by -
Defines how the current list of Contacts are sorted:
Given name
or
Family name
.
• Display contacts by -
Defines how the current list of Contacts are
listed:
Given name first
(ex: Steve Smith) or
Family name first
(Smith, Steve).
• Select contacts to display -
Allows you to filter Contacts based on
category entries from within the locations such as:
Phone
,
SIM
,
Google
, and
Microsoft Exchange ActiveSync
.
3. Tap
Done
.
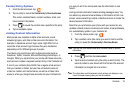
Adding more Contacts via Accounts and Sync
When you synchronize applications such as Facebook, Twitter,
Linkedin, a corporate email account, or Google, using the
Accounts and sync option synchronizes the data from the selected
account type with your Contacts list.
1. Press ➔ and then tap ➔
Accounts and
sync
➔
Add account
.