


11
4.
Touch
Wi-Fi
if you want to connect to Wi-Fi immediately.
For more information, refer to “Wi-Fi” on page 146.
Touch
Next
to continue.
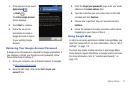
5. At the
Set up accounts
screen, touch one of the following
options or touch
Next
to continue. You can set up accounts
later, if you prefer.
• Google account
: Set up a Google account. For more information,
refer to
“Creating a New Google Account”
on page 11.
• Exchange account
: Set up email with an exchange server. For
more information, refer to
“Signing into Your Email”
on
page 105.
• Other email accounts
: Set up other email accounts such as Yahoo,
Hotmail, and so on. For more information, refer to
“Signing into
Your Email”
on page 105.
6. At the
Set up Social Networks
screen, touch one of the
following options or touch
Next
to continue. You can set up
accounts later, if you prefer.
• Facebook
: Set up a Facebook account. For more information, refer
to
“Facebook”
on page 163.
• Twitter
: Set up a Twitter account. For more information, refer to
“Adding an Account”
on page 129.
•MySpace
: allows you to set up a MySpace account. For more
information, refer to
“Adding an Account”
on page 129.
7. The
Learn more
screen displays with a web link to learn
more about your new phone.
8. Touch
Finish
.
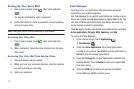
Creating a New Google Account
Your new phone uses your Google™ account to fully utilize its
Android features, including Gmail, Maps, Navigation, Google Talk,
and the Android Market.
When you turn on your device for the first time, create a new
Google account or sign in to your existing Google account.
Setting up a connection with your Google account helps to ensure
that Google applications are always in sync between your phone
and computer.
After you start your phone for the first time, follow these steps: