Setting Up the Export of Data to a Database
Chapter 3 Getting Started 61
To Set Up Database Export
1 In the PATROL DashBoard Control Panel navigation tree, click DataBase.
The Database Export Setup window is displayed, as shown in Figure 15:
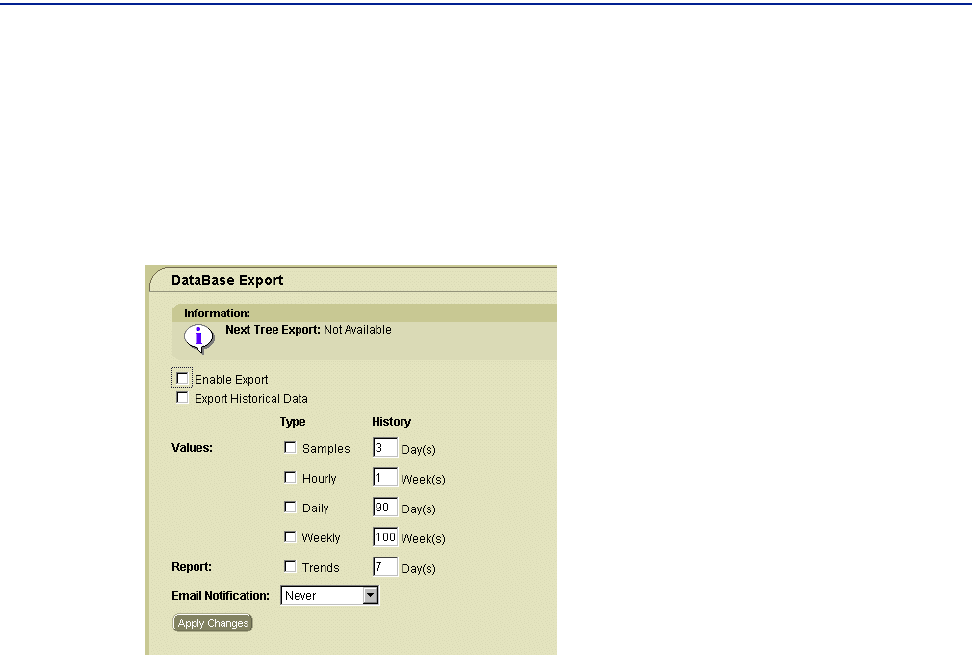
Figure 15 Database Export Setup
2 Check the Export Enable box to validate the export to the CIM database of the
values that you specify in the
Values section under Type.
3 Check the Export Historical Data box to export historical values as well as
immediate values, as specified in the
Values section under History.
4 In the Values section, select types of data to export, and then, for each type, specify
a
History period.
History is the maximum retention period for the data in the database. At the end of
the
History period, the old data is pushed out as new data is added to the database
on a first-in, first-out (FIFO) basis.
5 In the Report section, select the Trends check box to export Trends reports, and then
specify the number of days to use in calculating those trends in the
Day(s) box.
6 In Email Notification, specify the type of notification that you want:
■ Never: sends no e-mail notification
■ On Errors: sends e-mail notification only if errors occur during export
■ Always: sends e-mail notification at each export
7 Click Apply Changes.


