9
380 Nokia Network Voyager for IPSO 4.0 Reference Guide
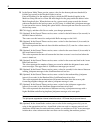
7. In the Sparse Mode Rendezvous Point (RP) Configuration section, to enable this router as a
Candidate Rendezvous Point:
a. Click On in the Candidate RP Router field.
b. (Optional) Enter the local address of the Candidate Rendezvous Point router in the Local
Address field. This router sends Candidate Rendezvous Point messages.
Configure an address for the Candidate Rendezvous Point to select the local address used
in candidate-RP-advertisements sent to the elected bootstrap router. By default, the router
chooses an address from one of the interfaces on which PIM is enabled.
c. (Optional) Enter the Candidate Rendezvous Point priority (0 to 255) in the Priority text
box.
Use the priority option to set the priority for this rendezvous point. The lower this value,
the higher the priority. The default priority value is 0.
8. (Optional) To configure a multicast address for which this router is designated as the
rendezvous point, in the Local RPSET field, enter an IP address in the Multicast address
group text box and the address mask length in the Mask length text box.
Note
If you do not configure a multicast address for the router, it advertises as able to function
as the rendezvous point for all multicast groups (224/4)
9. Click Apply.
10. To make your changes permanent, click Save.
Configuring a PIM-SM Static Rendezvous Point
1. Click PIM under Configuration > Routing Configuration in the tree view.
2. In the PIM Instance Mode field, click On for sparse.
3. Click Apply.
4. In the Interfaces section, click On for each interface on which to run PIM.
Note
The number of interfaces on which you can run PIM is unlimited.
5. Click Apply.
6. In the Sparse Mode Rendezvous Point (RP) Configuration section, to enable a Static
Rendezvous Point router, click On in the Static RP Router field.


